This will guide the reader throught the steps to start using the extension and to configure the servers that communicate with the extension.
Start using the extension
Follow the steps to use the extension.
- add the extension to your Chrome
- configure the servers and the switches to send
- set up the name
- design que options to review later
- choose the types of notification to appear
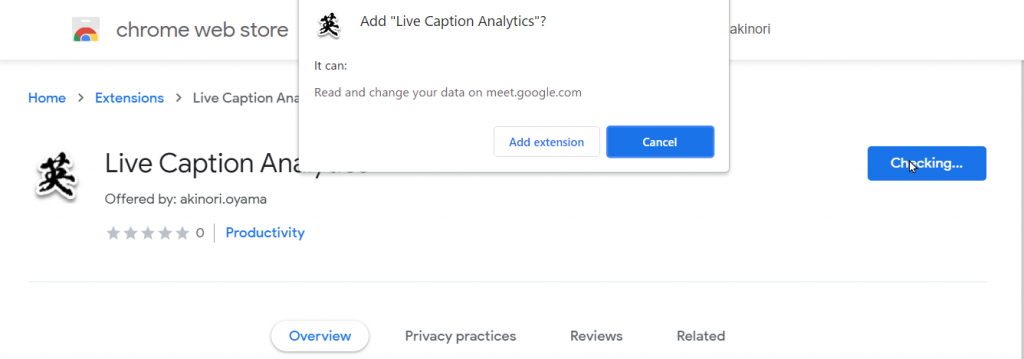
1. add the extension to your Chrome
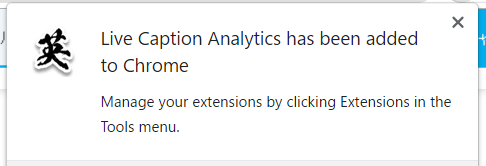
Add to Chrome from here. Upon "Add extension" popup, choose "Add extension," if you agree. A notification popup will show it has been added to Chrome.
2. configure the servers and the switches to send
Enter URLs for the servers provided by your service provider for live caption analytics.
Enter "Server URL to record captions" to send for analysis. This server may reside on your local machine or a remote server that is hosted. Turn on (or check) "Send captions to analytics server" to enable the extension to connect the server.
Enter "Server URL to record for Google Spreadsheet" for record. This URL is a proprietary address that you can create with the steps highlighted in the section "LCA Googlespreadsheet integration". Turn on (or check) "Send captions to Spreadsheet" to feed live caption to the created spreadsheet.
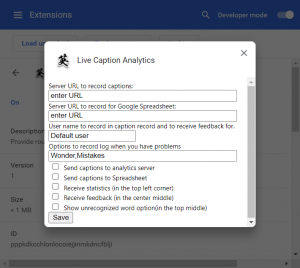
3. set up the name
Enter "User name to record in caption record and to receive feedbac for" to set up a name of your choice to record your utterance in the caption and customize the analytics result tailored for you.
4. design que options to review later
Enter "Opitions to record log when you have problems" as comma separated string to create buttons of your preferences that indicate a type of que or event under which it is recorded. For example, an entry - Wonder,Mistakes will create two buttons titled "Wonder" and "Mistakes" and each button will trigger logging that moment with the defined event name.
5. choose the types of notification to appear
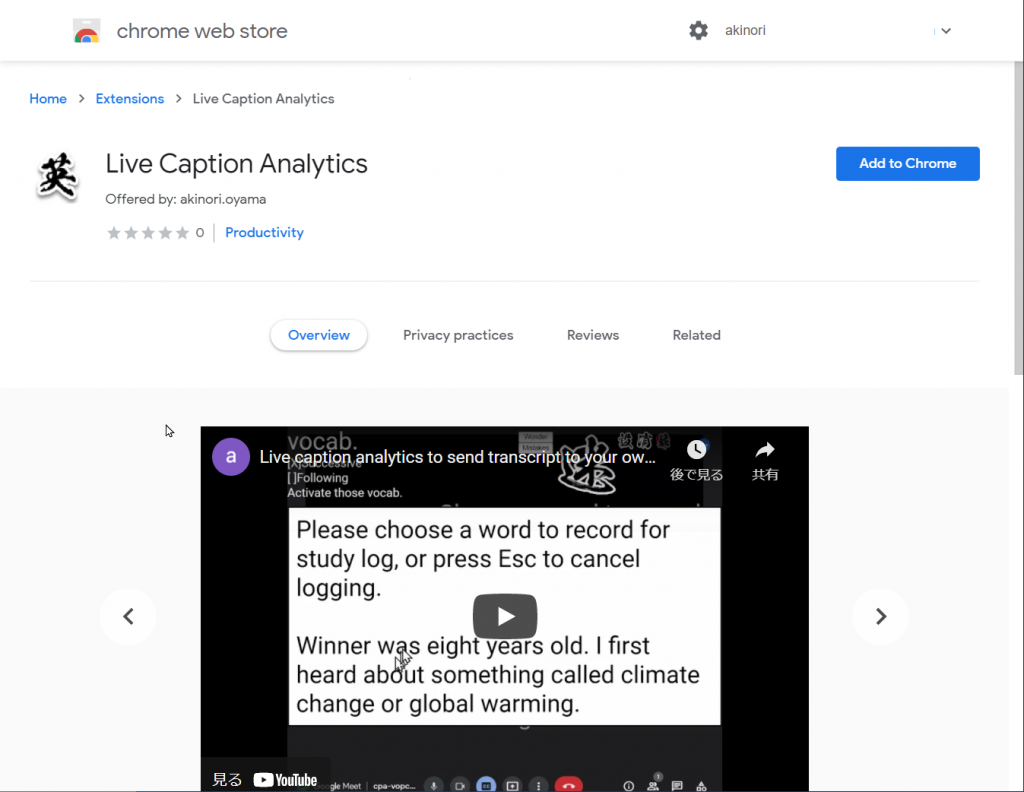
Turn on or off the three predetermined options to choose the types of information to be shown in the screen. Each type has its own area and purposes. A simple example of each type is shown below.

1. Stats area 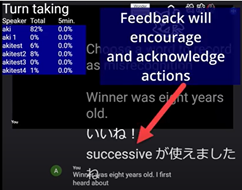
2. feedback area 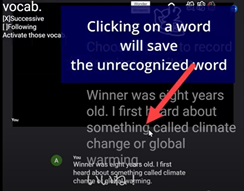
3. unrecognized word area
1. stats area: is intended to show statistics or statuses of progress
2. feedback area: is designed to provide live feedback and acknowledgement
3. unrecognized word area: show live caption to allow the user to highlight any unrecognized word by the voice recognition.
Configure the servers
The information is available in the README of GitHub repo (here).